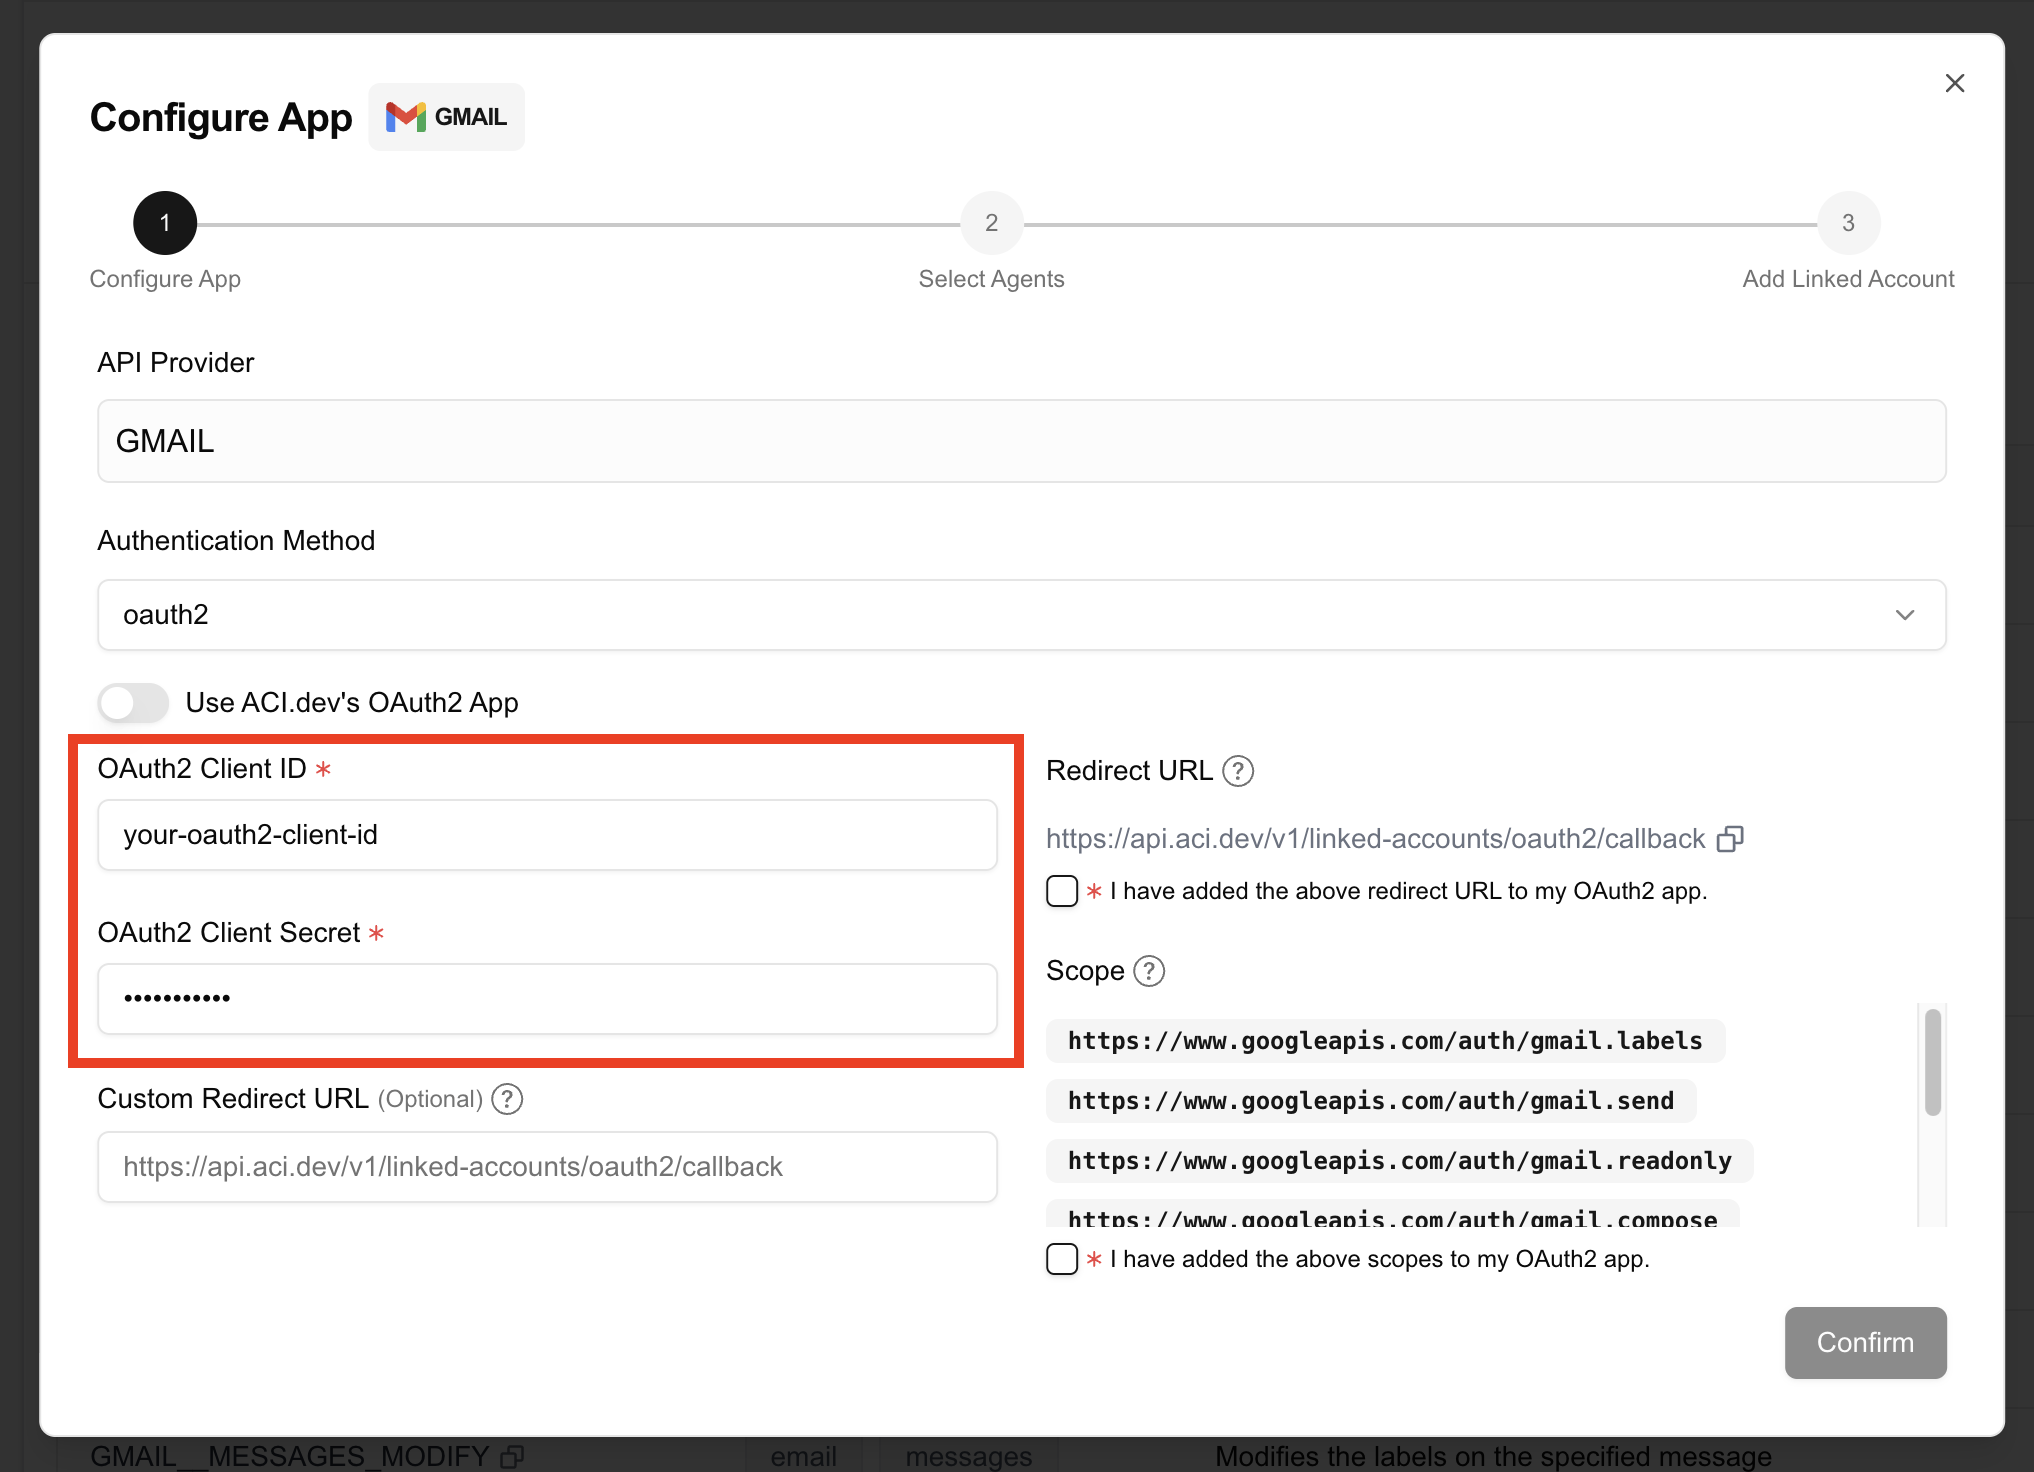
App with oauth2 authentication method.
Why provide your own OAuth2 client?
Branding & White-labeling- Your name and logo appear on OAuth2 consent screens
- Delivers a white-labelled experience, free from third-party branding
- Builds user trust by presenting a consistent, recognizable interface
- Full control over OAuth2 settings (token lifetimes, scopes, redirect URIs, etc.)
- Easier integration with your own internal systems or policies
How to configure your own OAuth2 client?
Create an OAuth2 client in the App provider's dev portal
For example, if you are configuring
GMAIL, you need to create an OAuth2 client in the google cloud console.Configure OAuth2 scopes in your OAuth2 client
Most OAuth2 app providers have fine-grained control over the scopes of the OAuth2 client. You need to configure the scopes for your OAuth2 client to match the scopes the app requires.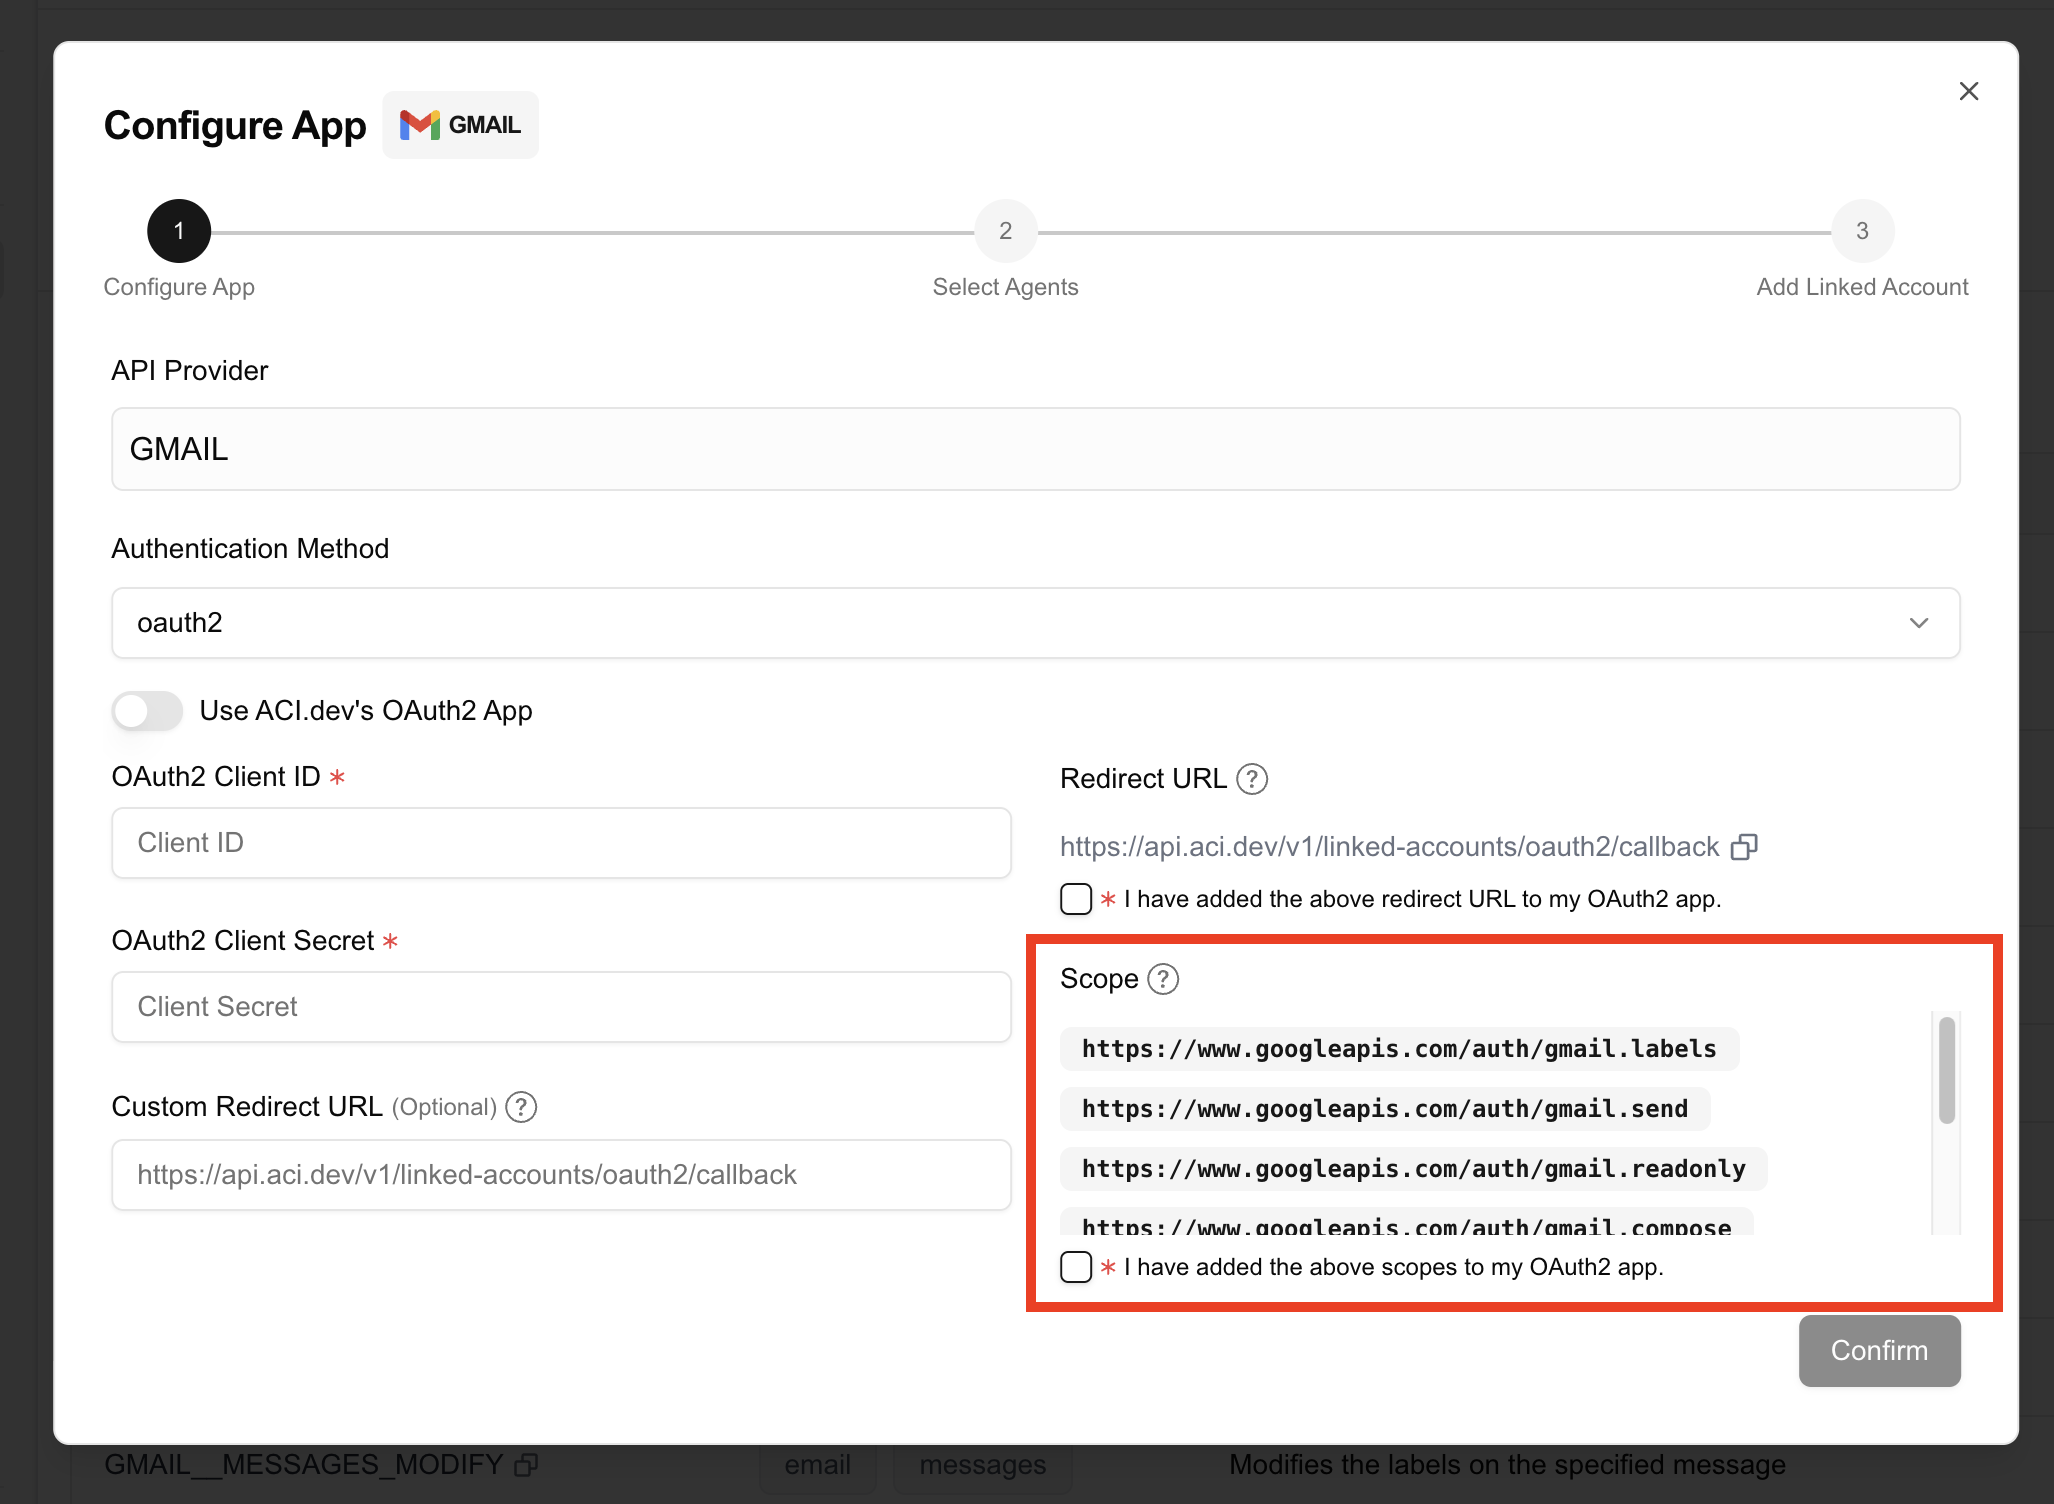
Set redirect URL in your OAuth2 client
The redirect URL is the URL that the oauth2 provider will redirect to after the user has authenticated.
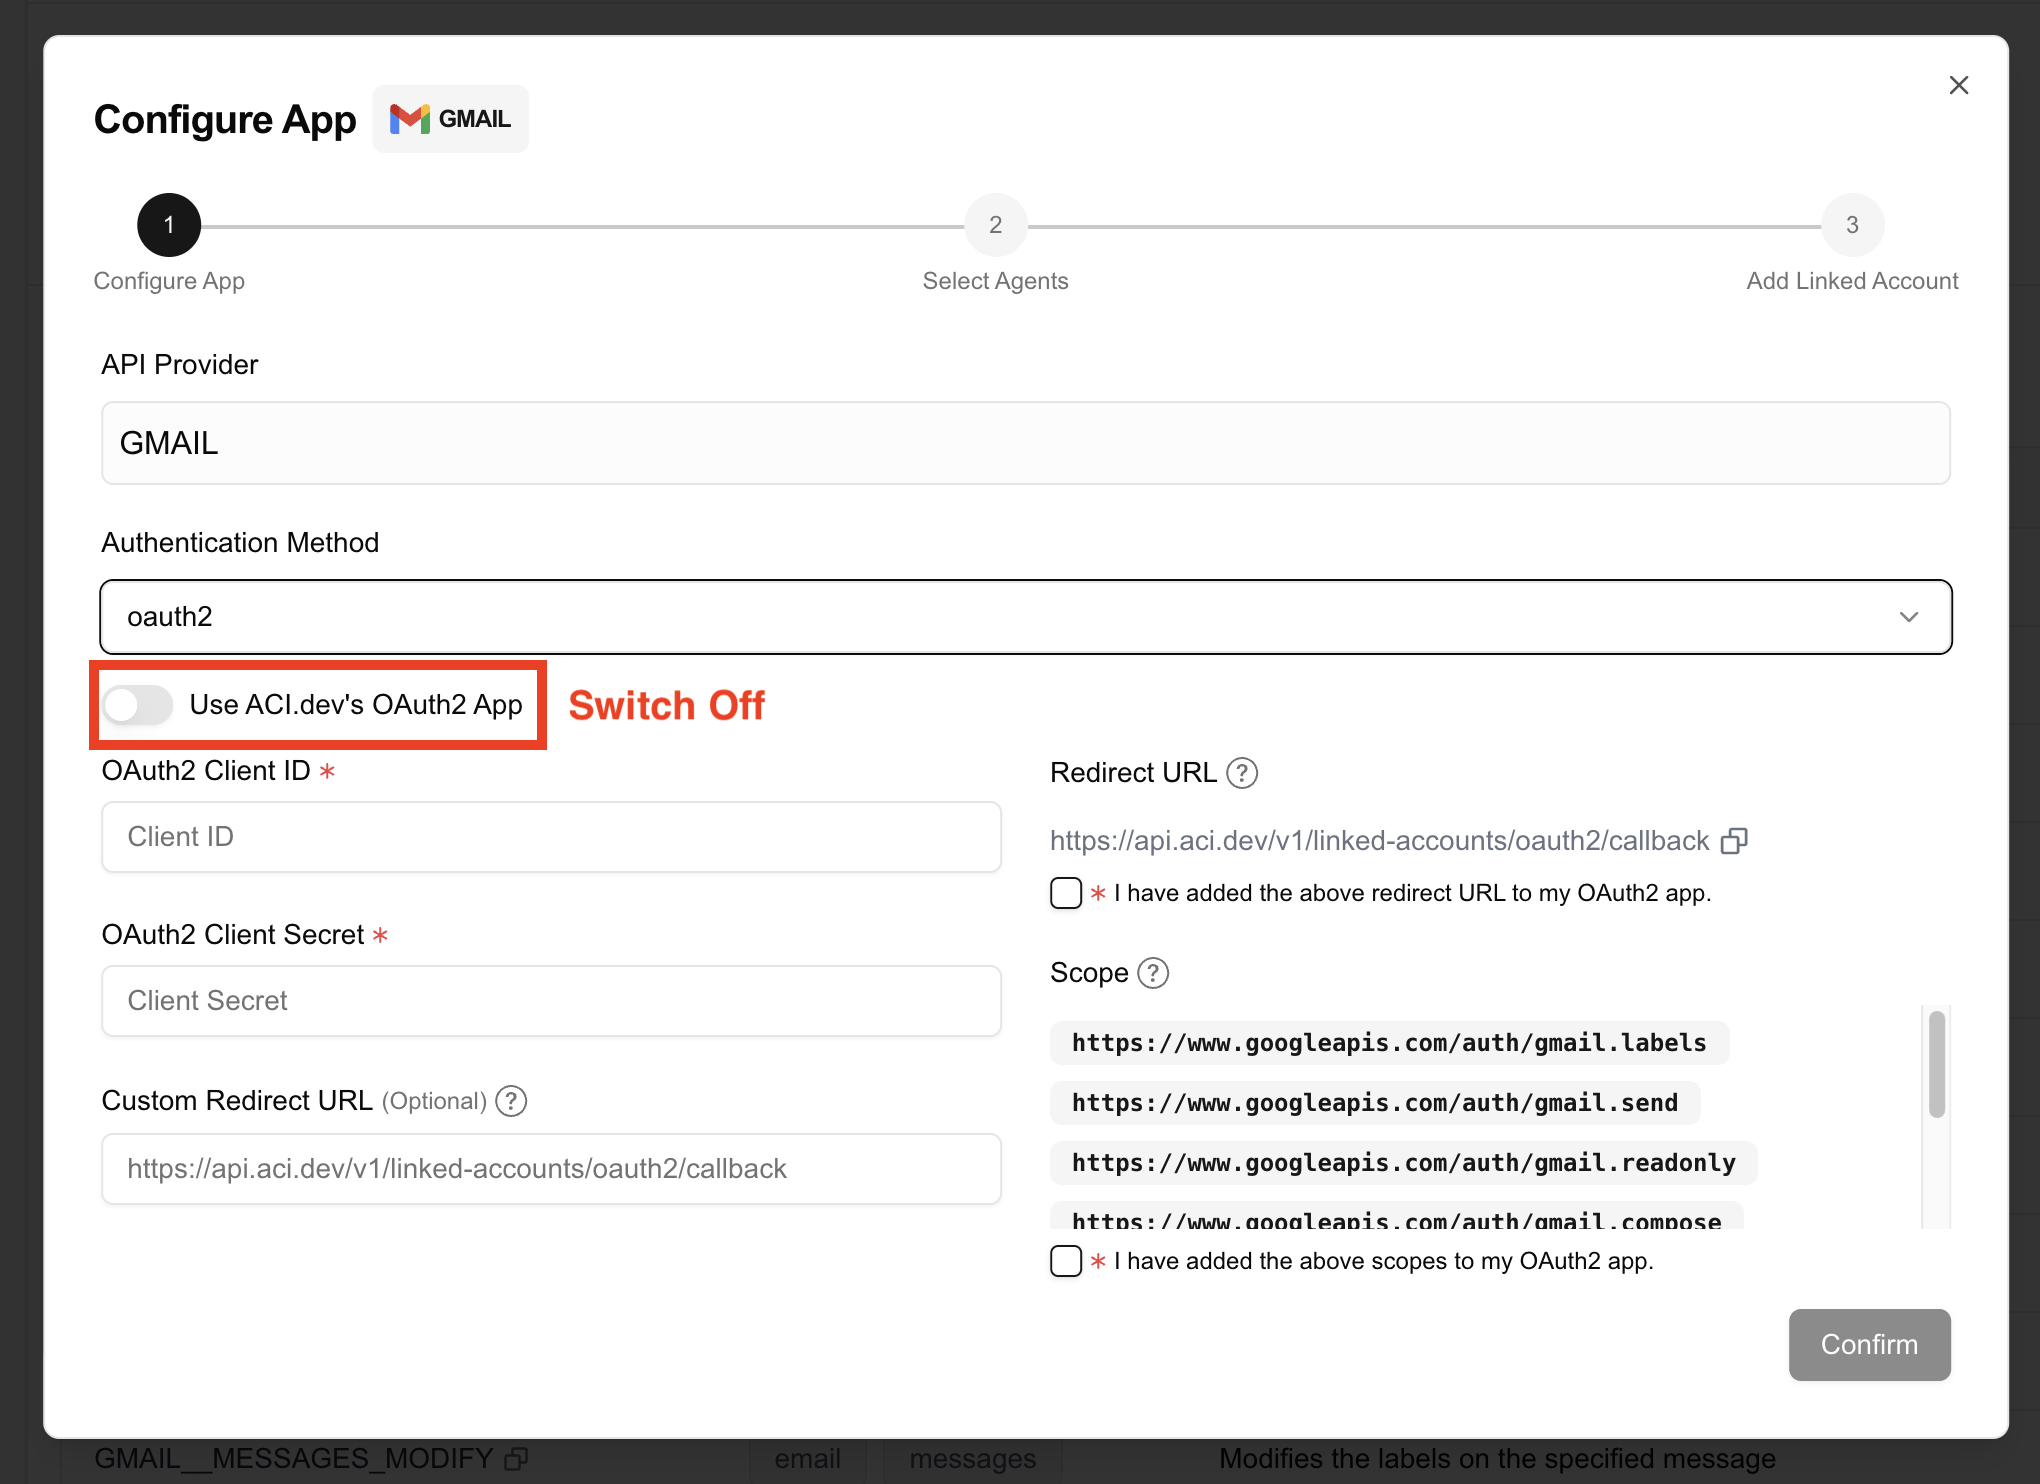
You have two options for setting the redirect URL: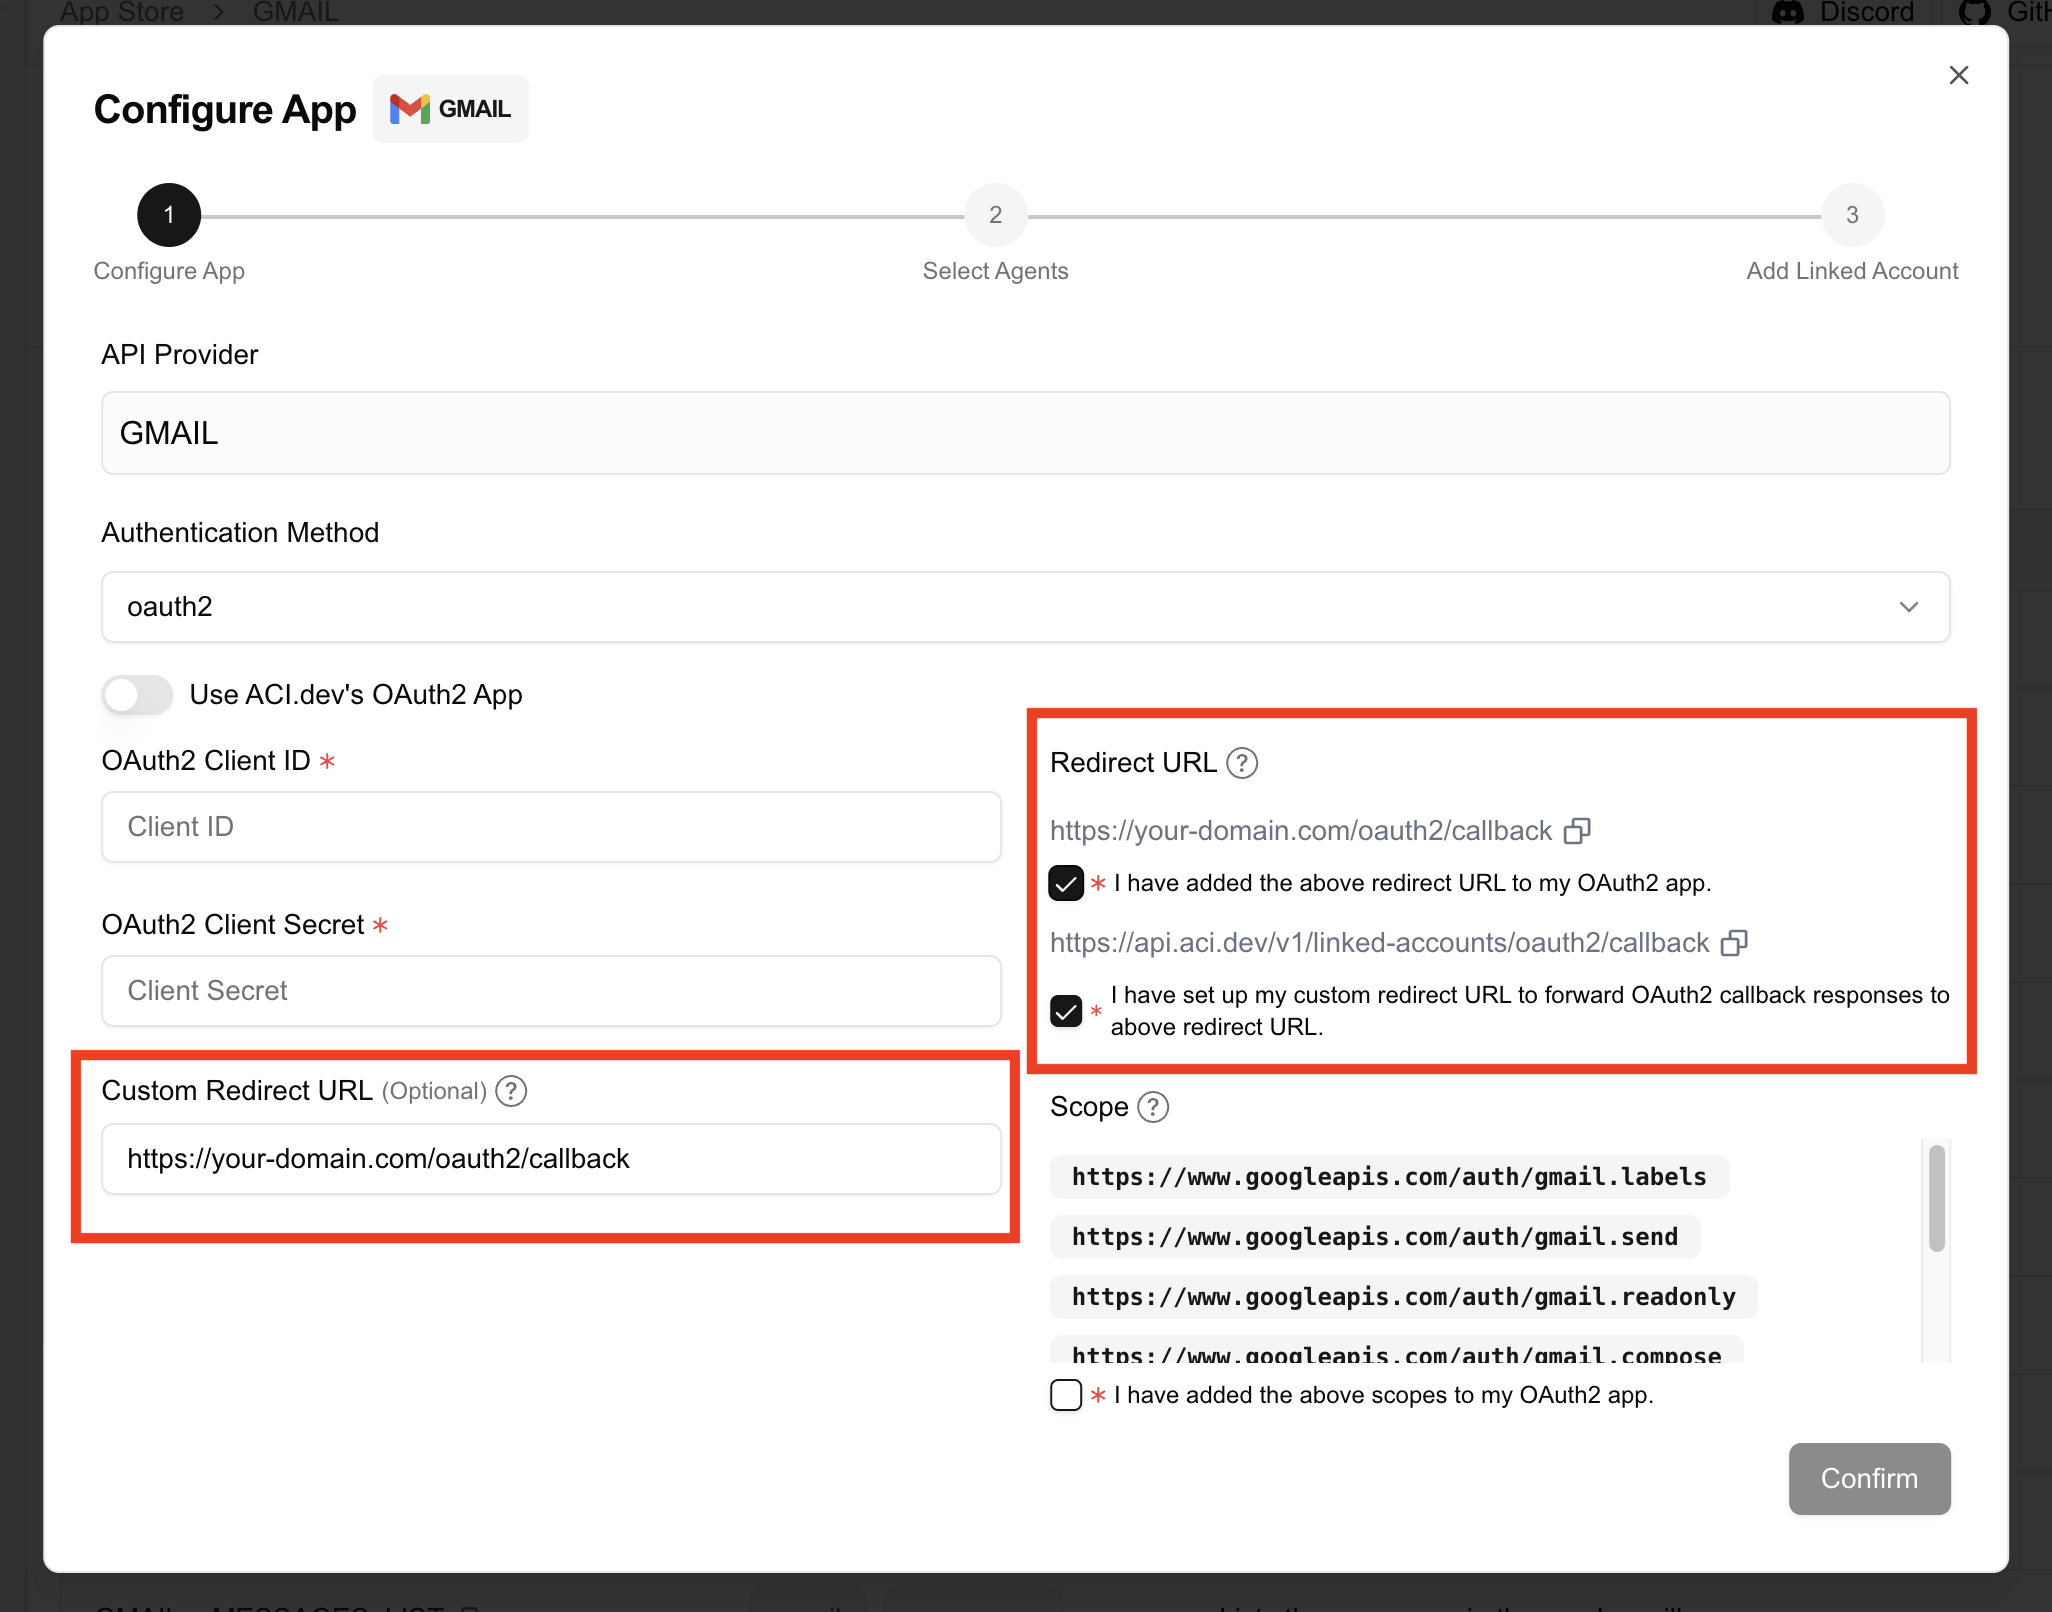
- (Simple) Use ACI.dev’s default redirect URL
- (Advanced) Use your own redirect URL, e.g.,
https://your-domain.com/oauth2/callback
When will you need to use the second option?Some OAuth2 providers—such as Google—display the domain of the redirect URL during the authorization flow. This means that if your users are redirected to our platform’s domain, it will appear in the authorization screen, potentially exposing our brand instead of yours.To preserve your brand identity throughout the OAuth2 flow, you need to use you own redirect URL.
Then, configure your backend to forward requests from your own redirect URL to ACI.dev’s redirect endpoint. This way, the domain shown to the end user during authorization remains your own, maintaining a seamless white-labeled experience